Pagina's

donderdag 2 december 2010

Sneak-Peek Dead Ringer


A picture says more than a 1000 words..


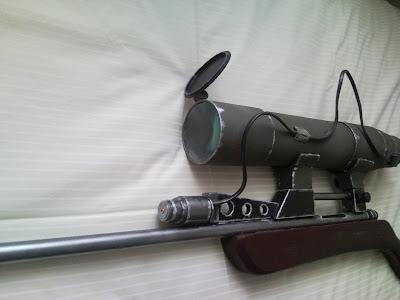
The Dead Ringer will be fully functional,
expect for the cloak.....sorry

(I'm not sure if an audio device will fit in there,
but nothing is sure yet.)


I'm going to make a mold, so I can make a
couple more of them.

Meaning that I'll put them on Ebay.

Gr. Brandon

maandag 30 augustus 2010

It's Up To YOU!!!!

A Couple of weeks ago I started a Project called: " TF2 Sniper Rifle".
I'm in the mood for making a new replica, but I don't know what to build. So i thought
it would be a nice idea to let people on the Internet decide what kind of replica they would like to see.

Thereby I start a contest which YOU can choose what to build. It can be everything that has ever occurred in a Movie, Game or even a Cartoon. I have 100$ in cash, so it will be a high cost project.
And not a crappy project. Also i would like to see new things. So not a Portal gun, or a Halo helmet.
Because those things have been done before

I'll wait for 2 weeks, then i'll decide what to build according to the auditions....

SO GET YOUR KEYBOARDS!!!! AND COMMENT WHAT YOU WOULD LIKE TO SEE!!!


AND BE CREATIVE!!!


Good Luck


IF YOU CAN'T REACT, OR POST A COMMENT SEND
UR SUBMISSION TO


b.caasenbrood@gmail.com

zondag 29 augustus 2010

TF2 Sniper Rifle Replica

Everybody who played Team Fortress 2 knows the character "The Sniper". With his primary weapon a "Scoped Bolt-Action Rifle". Actually a HUGE SCOPE....

I'm starting a new project of building a life-sized replica of this gun. Also capable of use the scope and a firing mechanism. I'm going to spend from 50$ till 100$ for this project, so it falls under the medium budget projects.


I started out making a paper silhouette of the wooden handle of the gun.


Next up I drew that silhouette onto a 11/4 inch thick MDF plate


For a good wooden handle I needed three of those pieces and 
and glued them together afterwards


I used contact-glue to glue those part together. I also could use 
wood-glue but I didn't had any. Those part needs to be compressed
so I let gravity do it's job :P 


When the wood is becomes a solid block, I started to file them 
with a grove wood file


Doesn't matter if those part are unequal. A file can do wonders


The file isn't only for making the parts equal, it's also for making 
some dynamic shapes into the wood. Later on I used sandpaper 
to smooth out the shape.


I used a 4 inch diameter PVC tube, and some 
parts of a telescope to make the scope.


At the end of the scope there's going to be a optic glass, so I used 
carton pieces to make the glass fit.


A working scope needs four glass to give you a clear zoomed view.
I used a magnifying glass, and glasses from a telescope.


Nice and Shiny


Next up I started with the middle section by drawing them onto
same MDF plate


I made two of those part, filed them, used sandpaper and glued them together

After drying I filed a rounding into them, that is where the
barrel is going to be.


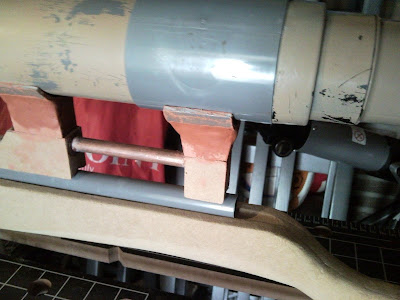
After that is glued a copper tube between those parts.


Next up is I made the bolt from copper tubbing.


The laser part of the gun is made from 3/4 inch thick MDF


The middle is half way finished


Next I made the part that are going to hold the scope from MDF and PVC


For the barrel is used 3/4 inch pvc tube and used a laser that looked
actually like the laser of the Sniper Rifle


Used some clay to smooth out the shape of the holders


I sanded the wooden handle one last the and used some real,
dark,wood-lake for the gun. And they look like chocolate parts...


The first coating of jungle green, later on I added another layer


The middle section was painted with metallic-grey and -dark grey


The holders also needed to be painted with jungle green

The first layer of paint is a great succes


When the first coating is ready, I went into the details. By adjusting the scope


I placed this little memo in the middle where the scope was pointed. 
And adjusted the laser


That's sweet


Next up I made this from MFD and filed it so it fits perfectly


Then I made a hole into the scope with a soldering tool, drilling
has the risk of scattering
Drilled a hole into the piece and TADA...


Then I made a little switch circuit into the end of the scope
so the laser can be switch on


Wires look sweet


I made this little trigger from carton, MDF  and springs. The
trigger is going to hold the spring back and releases it when
trigged


When the pin gets pulled back it will get stuck caused by the trigger


Then I added some extra texture